Yum
Showing posts with label lime. Show all posts

Quest 102: Lime ChuChu Cookies

Chuchus are everywhere, but my favorite are the creepy version that shows up in Majora's Mask. The expression of the face and the fact that you can see what you will get as a reward are just too much. Today, we will capture these creepy little guys in a cookie with a sour twist - Lime ChuChu Cookies. They are basically a box of lime gelatin that got together with a sugar cookie. Surprisingly good with the sweet and sour combination. These are just about the simplest thing you can make. Enjoy!

Gear!
1-1/2 cups butter, softened
1 cup sugar
2 packets (3 oz) Lime Flavored Gelatin, divided
1 egg
1 tsp. vanilla
3-1/2 cups gluten free AP flour with xanthium gum - We used Pamela's!
1 tsp. baking powder
Candied eyes, heart pieces
Green Sugar Glitter


Quest!
Preheat the oven to 400 degrees F. 

Cream together butter, sugar and 1 of the gelatin packets. Add egg and vanilla, Stir. Add in Flour and baking powder. Stir to combine. Let dough sit for 10 minutes.

Pour our second gelatin packet onto a plate. Form dough into 1 inch balls and dip into gelatin powder. Place on a baking sheet and with a cookie stamp or bottom of a flat glass, press each cookie flat. Add eyes, heart piece and additional sugar glitter. 

Bake for 8-10 minutes or until just turning golden. 

Cool on sheet for a minute or two before transferring to a cooling rack. 

Repeat until all cookies are baked. 

Enjoy!


Follow the ZeldaGourmet to bring 
LOZ into your home every week! Enjoy!


Quest 74: Vitreous - Gelatin Boss Fight


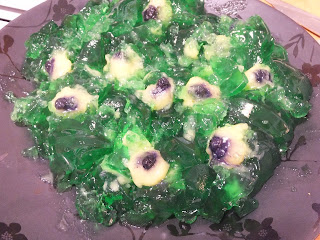
It's time to do a boss fight! Vitreous is the sixth boss in A Link to the Past in Misery Mire. Described as "a gigantic eyeball surrounded by smaller eyeballs, immersed in an acidic green liquid" certainly sounds yummy, but I think we can make it a little more palatable. Enjoy today's quest to defeat this monster on our quest to save the princess and ourselves from hunger. Enjoy!


Gear!
Large Box Lime Gelatin 
2 cups boiling water
2 cups cold water
Small Box Instant Lemon Pudding
2 cups milk, cold
A dozen blueberries
2 envelopes Knoxx unflavored gelatin
Blueberries
Silicone Ice Cube Tray
Bundt pan


Quest!
 In a bowl, add one envelope of unflavored gelatin to the bowl along with the 2 cups of cold milk. Let gelatin bloom for about 5 minutes. Add lemon pudding mix and mix together for about 2 minutes. It should be pretty thick. Set aside until you get the ice cube trays set up.


I used a flower silicone ice cube tray from IKEA. This one is nice because it has a place for the blueberries to sit in. Speaking of which, add the blueberries to the bottom of your tray. Any shape should work, but something rounded is appropriate for the eye shape we are trying to achieve.

Once you get the tray all set up with blueberries, add the lemon pudding to the tray. Set in the fridge to set up for several hours. You will have extra lemon pudding, so eat up! It's yummy!

 In a bowl, add the other envelop of unflavored gelatin along with the large box of lime gelatin. Add the boiling water and stir to dissolve. Add the cold water to the mixture and stir. Once combined, pour into bundt pan to create a shape. Set in the fridge to set up until fully set.
 I did have a little trouble getting my eyes out of the ice cube tray, so I did pop it into the freezer for about an hour and that seemed to help.
 Add the eyes to the main gelatin mold by cutting into the gelatin and pushing the eye into the slit.
Do this all the way around until they are all in the mold.
 In order to demold this thing, first add hot water to a large bowl. hold the bottom of the bundt pan into the hot water for about 30 seconds. Place a plate on top of the bundt pan and flip it over. If all goes relatively well, you should have something salvageable.
 Like this! It looks a little goofy, but take a spoon and flip the eyes around a little more . . .
Ta-da! Your very own boss monster! This is pretty refreshing on these hot summer days, and I hope you will enjoy it too. 


Be sure to follow on social media to stay up-to-date with all the latest from the Zelda Gourmet!


Quest 50: Red Potion

Happy 50th Recipe and Happy New Year! Today I would like to share with you my take on the famous red potion that helps our hero keep going when all seems lost. This recipe is made in a blender and meant to be shared to help the whole party going until the bitter end. Remember to enjoy responsibly!


Get The Printable Recipe Here!

Gear!
Frozen Whole Strawberries
6 shots of Honey Tequila
GF Beer - Like Burning Brothers
Limeade
Blender

Quest!
Fill up your blender up to the top with frozen strawberries.


Add Tequila and enough beer to fill the blender half way.


Add Limeade until it fills up the rest of the blender.


Blend together until smooth and delicious. Pour into glasses and Enjoy!


Be sure to follow on social media to stay up-to-date with all the latest from the Zelda Gourmet!


Quest 39: Key-Lime Like-Likes

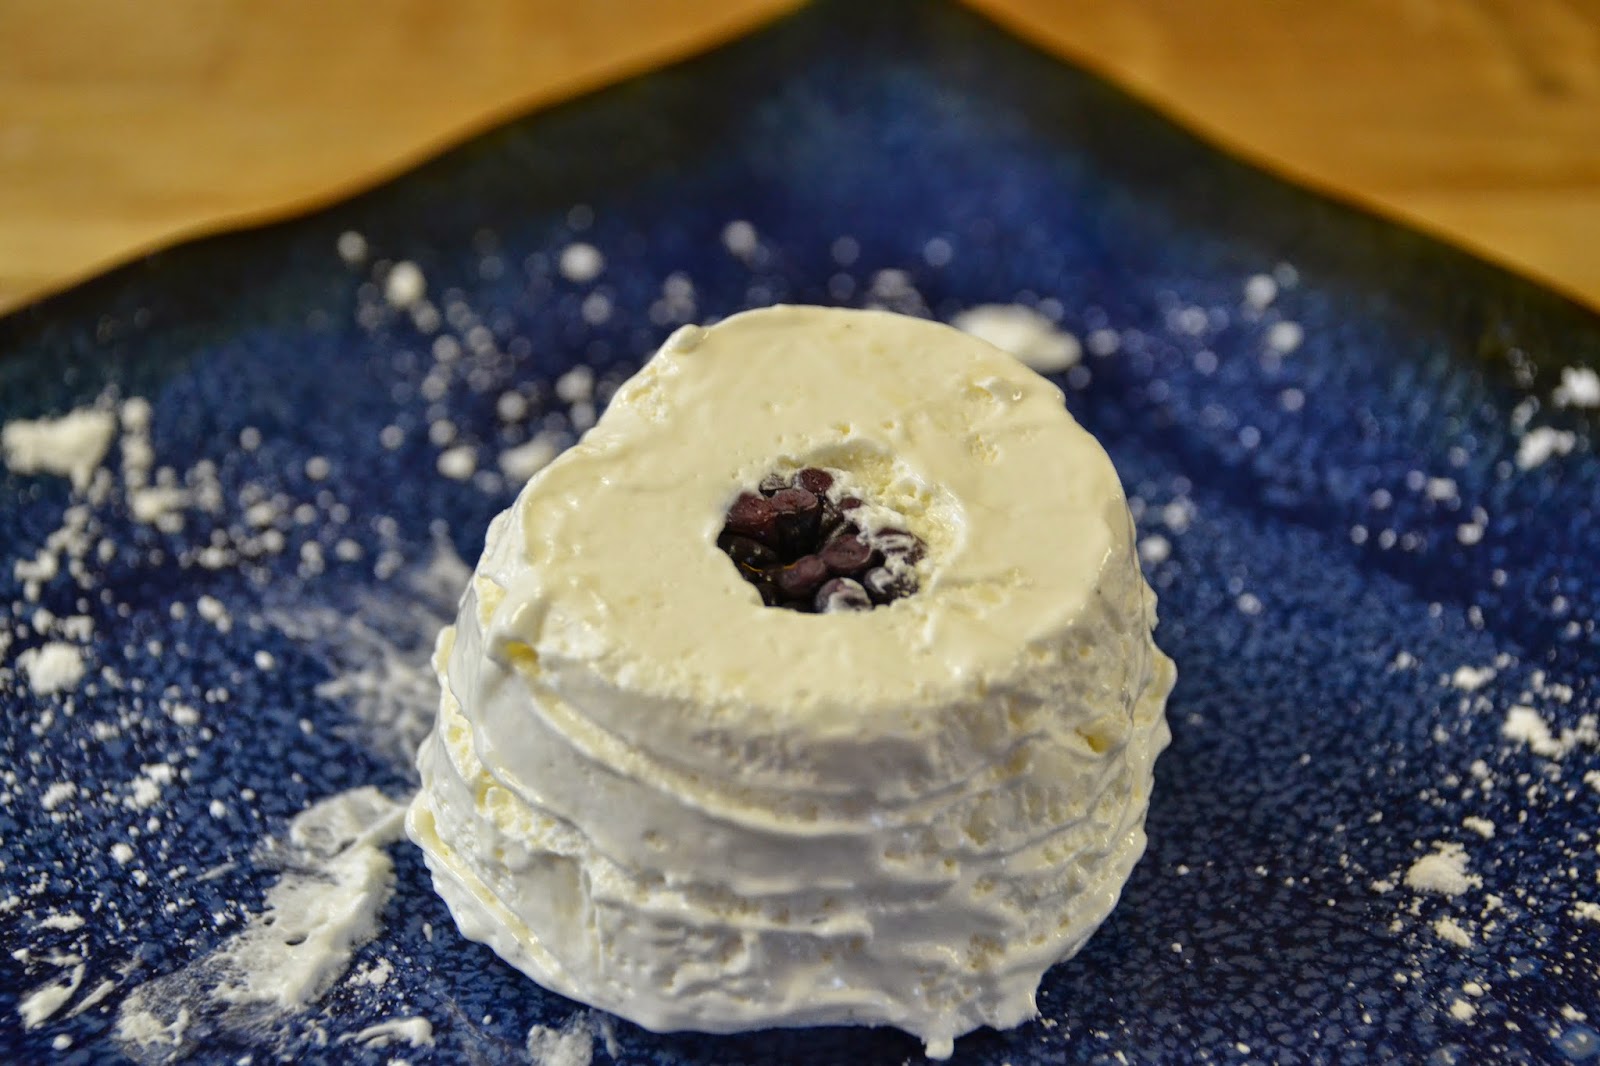
Like-Likes. What can I say? They slow you down, they steal your shield. They are just sour little creatures. So on that note, I thought about things that were sour and could be shaped? Frozen is a good option. Limes are sour. Hmmm. . . Key Lime Pie! With a few minor adjustments for gluten reasons and a little creativity for yumminess, we have today's recipe - Key Lime Like-Likes!


Gear!
8 oz. Cream Cheese
1 can of Sweetened Condensed Milk
8 oz. Cool-Whip
1/2 cup Lime Juice - Fresh Squeezed
1/4 cup sugar
Blackberries

Quest!
Start with spraying a muffin tin with non stick spray. Place blackberries one in the middle of each of the muffins.


Cream the cream cheese in a mixing bowl.


Add sweetened condensed milk and lime juice and mix.


Add Cool-Whip and sugar and mix.


When nice and smooth, spoon into muffin tins. You may have to spoon around the blackberry to make sure that it stays on the bottom in the middle. Fill each all the way to the top.


Place in the freezer for at least 4 hours. When they are firm.


Tip out of the muffin tin and add a few lines to the sides for good measure using a tooth pick. Enjoy!


Be sure to follow on social media to stay up-to-date with all the latest from the Zelda Gourmet!
Created By Sora Templates