Yum

Quest: 29: Bombs Away!


One of the most useful items in all of the LoZ titles are Bombs. I like that they allow you to not only defeat your hard to beat enemies, but also open up new paths to explore. In honor of this awesome item, we are going to make bombs! Now, before you go getting all crazy on me - we are making edible bombs that are no way harmful unless you are allergic to chocolate, fondant or cherries. That's right~ we are making chocolate covered cherries!!! Super easy, fun and of course - delicious. Enjoy these with your sweetie for Valentine's day - just around the corner!! Enjoy!


The Gear
10 oz, Jar Maraschino Cherries with Long Stems
8 oz, Melting Chocolate
6 oz. White Fondant
Waxed Paper
Cookie Sheet

The Quest

 First thing is to drain the bottle of cherries in a colander in the sink. You can also save the juice for a lovely cocktail later. Pat them dry with a paper towel and set aside.
In a double boiler over medium low heat, add fondant and stir until liquefied. If you have a little trouble getting it to melt, add just a tablespoon or two of milk to help get it going.
Turn heat off. Dip each cherry in the fondant. you may have to use a rubber spatula to help get the fondant onto the cherry. Let excess fondant drip off back into the pot.
 Transfer to a cookie sheet with wax paper on it. Let these set up for about 30 minutes.
In a double boiler over medium low heat, add chocolate and stir until liquefied. Turn heat to low. Dip the base of each cherry into the chocolate. Let the excess run back into the pot. Transfer back onto fresh waxed paper.
Once you have gone through all the cherries, they should be ready for their final coat. Take your first cherry and start again. Only this time, dunk the whole cherry into the chocolate. Again, you may have to use a rubber spatula to cover the cherry, Let the excess drip back into the pot and transfer to waxed paper.
 Let these set up for about an hour. You can trim off some time with a 30 minutes trip to the refrigerator if you have the space. . 


If you like the Zelda Gourmet, become an email follower or Google +1 so that you get the newest recipes when they come out. Also Like us on Facebook and Share this with your friends. 


Quest 28: Deviled Cucco Eggs

Cuccos are a great Easter egg to the Zelda lineage. Get it? Egg - Cucco. Okay, I understand I am not terribly witty, but that doesn't keep all the cuccos from making me bleed to death after repetitively assaulting one of their kin. Today, I have located some of their eggs and am going to make deviled cucco eggs. This is a simple dish, and many of you have even made these before. I am not trying to get over fancy with this one, but maybe give you some tips that will make the process a little easier.


The Gear: 
6 Eggs - Fresh Please
1 T. Dijon Mustard
4 T. Mayonnaise or Miracle Whip - Your preference. We're not going to start a fight.
1 t. Lemon Juice
Salt & Pepper to taste
1/8 t. Cayenne Pepper
1/4 t. Paprika + more for sprinkling


The Quest: 
Place your eggs in a sauce pot and fill the pot with cold water just to cover the eggs. Place on the stove and bring to a boil. Once it boils, turn off the heat and cover the pot. Start the timer for 4 minutes. This will give you a boiled egg with a soft, bright yellow center that is just on the verge of being completely cooked. Drain eggs in a colander and set aside to cool.


Once cooled, peel the eggs. The best way to accomplish this to crack each end of the egg and peel the ends. Start on one end of the egg and peel, working your way around the egg and up. Like working up a slinky.

Slice your eggs in half length-wise. Admire your pretty yellow yokes with no green ickyness. With a spoon, remove the yolks into a bowl. Place your whites on plate and set aside.

Break the yolks up with a spoon. Add your mustard, mayo, lemon juice, cayenne pepper, paprika, salt & pepper. Mix together, If it seem dry and hard to stir, add a little more mayo. Adjust you salt and pepper to your liking.


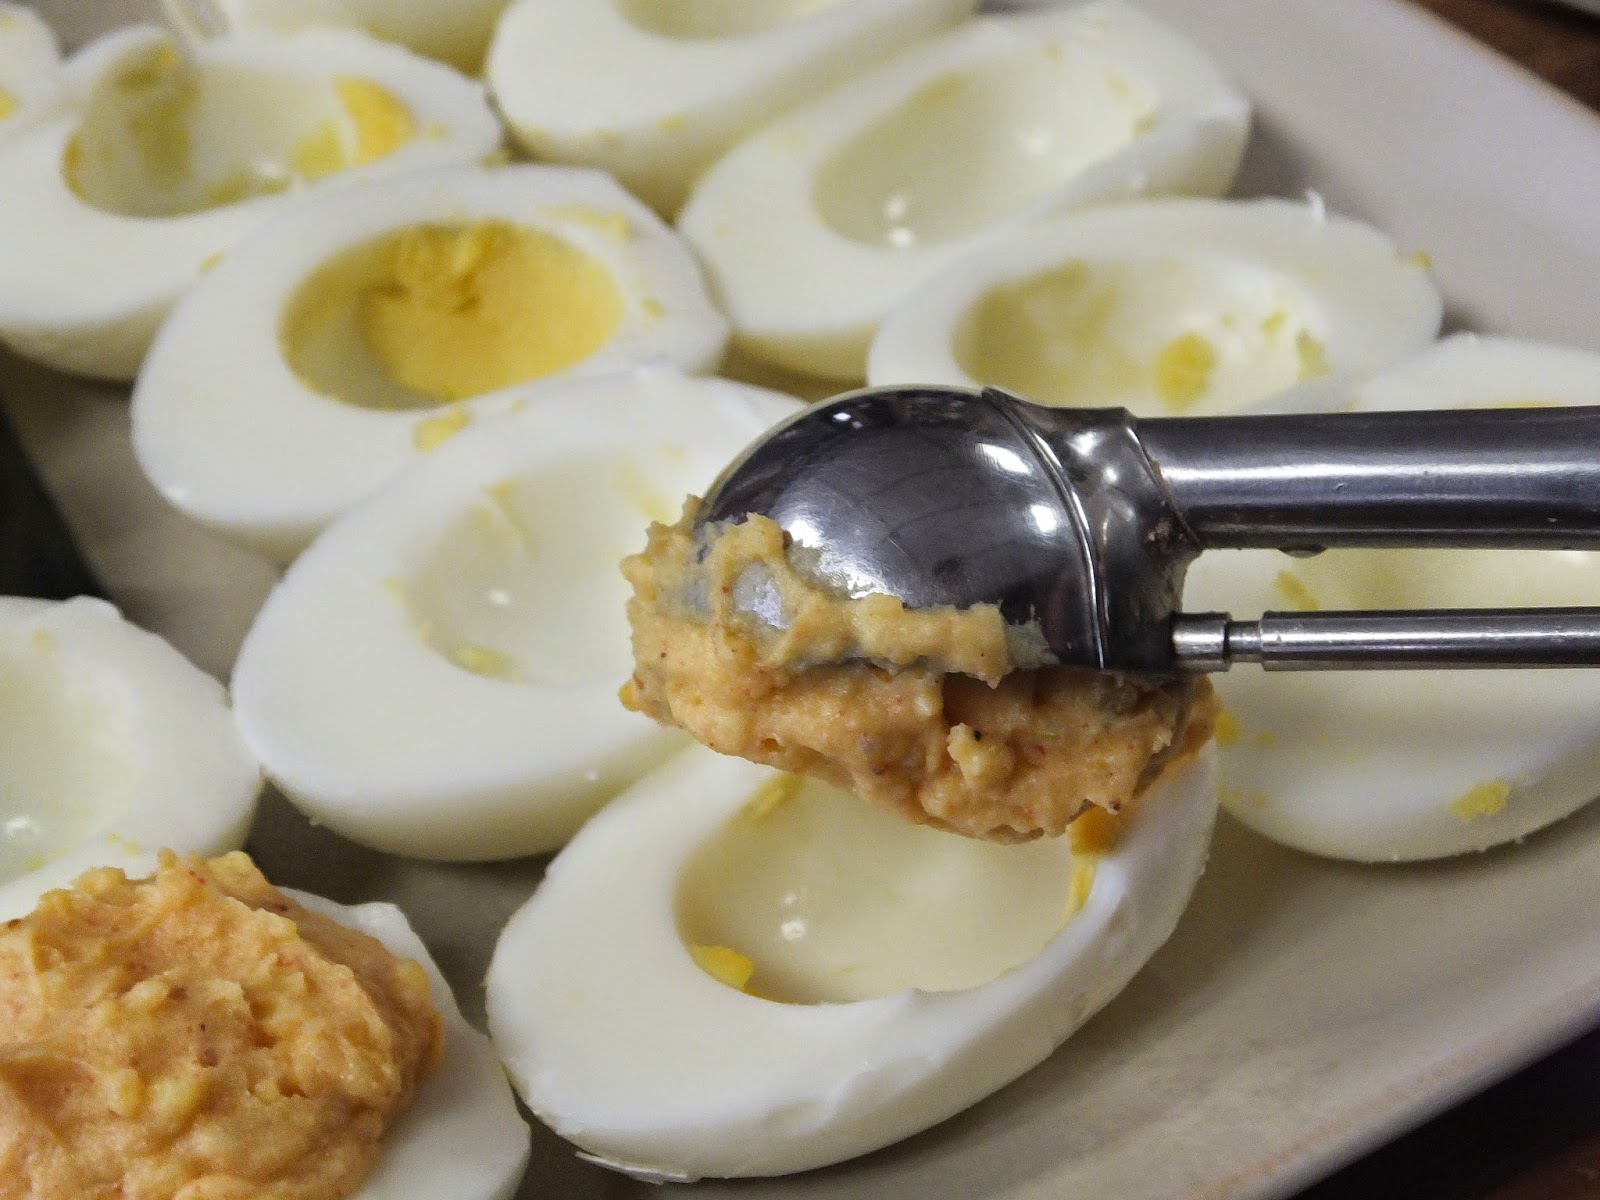
With a small cookie scoop, place a level scoop full onto each egg white refilling the spot where the yolks were. If you want to get fancy, take a fork and dollop the top of the mixture to create textures.


Sprinkle a little extra paprika on top to finish it off.


Get the Printable Version of this Recipe Here!!


If you like the Zelda Gourmet, become an email follower or Google +1 so that you get the newest recipes when they come out. Also Like us on Facebook and Share this with your friends. 


Quest 27: Ordon Pesto Pasta with Prosciutto and Peas


Since we are on the tangent of Ordon goat cheese, we will utilize the awesome pesto that we made on our last quest to create an easy, but fancy pasta dish your family will love.


The Gear:
1/3 cup Ordon Goat Cheese Pesto Get Recipe Here.
4 oz. Prosciutto Ham torn into small pieces
1/2 cup Frozen Peas
17.6 oz. Gluten Free Gnocchi
Olive Oil
Salt and Pepper to taste


The Quest: 

In a large nonstick pan, add a little olive oil and begin to crisp up your prosciutto pieces over medium low heat. This will help to render any fat. In the meantime, start a pot of boiling water to cook the gnocchi.

Once the prosciutto is crispy, drop your Gnocchi in the boiling water, salting the water first. Cook according to the directions, mine called for two minutes.


Scoop the Gnoochi into the pan with a slotted spoon, leaving the cooking liquid in the pot. Don't forget to turn off the pot. If you feel the need to dump out your pasta water, save about 1/2 cup for later.


Turning up the pan to medium, toss the gnocchi's in the pan with the  prosciutto for a few minutes letting them take on the flavors in the pan. Add the frozen peas and let them steam up and cook for just a minute. Then add the Ordon goat cheese pesto. Stir and add a ladle of the salted pasta water. Stir until the goat cheese melts and creates a nice sauce. Check salt and pepper.


Serve with a nice salad and some focaccia bread. Top with shaved Parmesan cheese. Enjoy!

Get the printable recipe here!


If you like the Zelda Gourmet, become an email follower or Google +1 so that you get the newest recipes when they come out. Also Like us on Facebook and Share this with your friends. 


Side Quest: Craft Night - Zelda Terrarium!


Tonight I became ambitious and decided to put together my terrarium. I gathered most of the loot from Michael's. I even found a jar that looks a little like a fairy jar to add some whimsy. I got the miniatures from GameStop. They come in little green eggs and you don't know what you are going to get. I carefully grabbed eggs of different weight and those who rattled differently. This is an effective measure because I got the adult Link and adult Zelda on my first try. I also got a darknut to add some drama to the scene. Enjoy! 

Gear:
A jar
Moss
Zelda Miniatures
Artificial flowers and leaves
Wire Clippers
Gorilla Glue
Piece of Cloth


Side Quest: 


I started with arranging moss along the edges, gluing as I went. Next, I glued the fern leaves in place. I then thought about how I wanted to arrange the miniatures. I ended up with all the miniatures except Tetra, so I decided to use the adult Link and Zelda and the on enemy, Darknut. I glued the figurines in place. Finally, I filled in the rest with other mosses, and added flowers and shrubs for depth. The miniatures come with extra pieces so I added a rupee and a crystal to grassy area. I placed a piece of cute fabric on the top to finish before closing the jar.


If you like the Zelda Gourmet, become an email follower or Google +1 so that you get the newest recipes when they come out. Also Like us on Facebook and Share this with your friends. 

Quest 26: Ordon Goat Cheese Pesto

Have you ever thought about the Ordon goats? They must have oodles of goat cheese everywhere. In order to help consume all this delicious goat cheese, I have come up with a recipe that can be used as a dip or a tasty dinner option - Pesto!

The Gear: 
4 oz. Basil leaves
1/2 cup Pine Nuts
2 Garlic Cloves, peeled
1 Serrano Peppers
1 T. Lemon Juice
1/3 cup Olive Oil
1 tsp. Salt
1/2 tsp. Pepper
6 oz. Goat Cheese with Herbs

The Quest:
Clean your basil. Whether you purchased it in the store or picked it from the garden, you should remove all the larger stems and rinse it in a colander until running water to remove any sand or dirt.
Thoroughly dry the basil leaves - I used a salad spinner, but blotting with paper towels could work too.


In the food processor, add your garlic and whole pepper (remove the stem). If you don't want yours so spicy, you will have to remove the seeds. Pulse about 5 times to get everything chopped small.


When you remove the lid, you may be taken aback from the strong garlic and pepper smell. This is fine, and it won't be as spicy when we are done because of the goat cheese. Add in the Pine Nuts and lemon juice. Pulse another 5 times to grind the nuts.


Add in the basil leaves, salt and pepper. Begin pulsing. Stream in olive oil through the top as you pulse. It will really pull together and make a consistent texture. Just keep checking.


At this point, you have spicy pesto, which is good, but to make it extra special and feature a major Ordon staple, we will now add the goat cheese to the food processor. Pulse 10 times to fully incorporate the goat cheese.


There you have it! Enjoy this as an appetizer dip or a great pasta sauce.

Do you know how to store extra?

I freeze the extra in these silicone ice cube like trays that come with a lid.


Well, I hope you enjoyed this week's recipe! Printable Version Here


If you like the Zelda Gourmet, become an email follower or Google +1 so that you get the newest recipes when they come out. Also Like us on Facebook and Share this with your friends. 


Created By Sora Templates